So, your students have acted out multiplication kinesthetically, they understand “groups of,” and now they’re ready for more!
It’s time to help students connect what they’ve learned from their kinesthetic experience to the concrete by creating an exploratory experience using concrete objects!
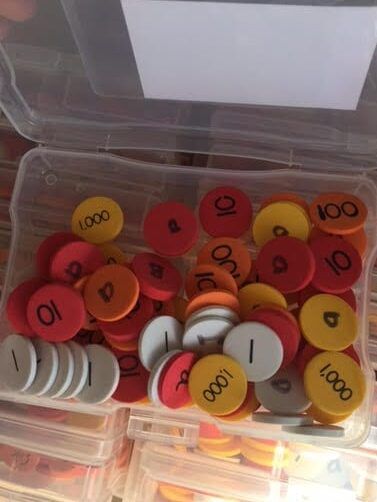
As most of you know, one of my favorite tools to use (for almost any subject!) is place value discs, and multiplication is no exception. They’re so versatile – you can use physical discs if you’re with students, or you can use the virtual discs (check out Virtual Manipulatives page under Multiplication) if you’re virtual.
Regardless of your teaching situation, we have a really amazing PowerPoint presentation (if you’re part of our M³: Molding Math Mindsets membership, download it free here or buy it in our store). I always say “go slow to go fast” and that rings especially true when we’re talking about the understanding of multiplication. This presentation walks you through the different problems and the steps that you want students to go through to make sure they have a thorough understanding of the concept. Want a sneak peek of the product? Check out this video!
Even though you might do this activity with third graders as they’re starting to understand the beginning concepts of multiplication, you might also be able to do this with higher level numbers as we start to talk about “groups of.”
Transitioning to Concrete
To help show “groups of” in this activity, students could use bowls or plates to make clear groups with their place value discs, just as we did with the hula hoops at the kinesthetic level.
A word of caution: make sure you choose numbers for your problems in such a way that you won’t run out of discs as students are acting it out. Manipulating the discs creates another imprint on the brain, similar to the memory of the kinesthetic activity, which will help as we move into the pictorial/concrete level later on.
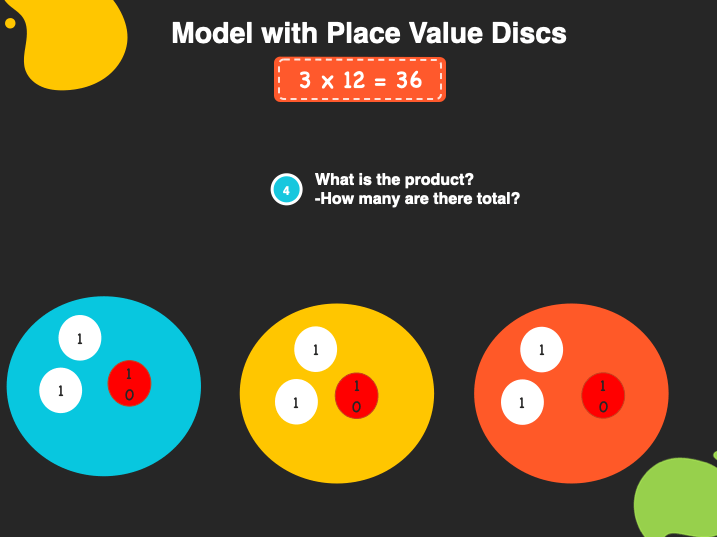
Start this off with something simple: ask students to show you 3 x 12 or 3 groups of 12. Give the students their discs, and allow them to begin exploring. Let them experience productive struggle as they begin to think through how they’re going to show you 3 groups of 12. Some students might start to count out 1s, but you want them to realize that they can make 12 with 1 red ten disc and 2 white one discs. They also need to remember to make 3 groups, not 12 groups of 3, because they won’t have enough discs for that!
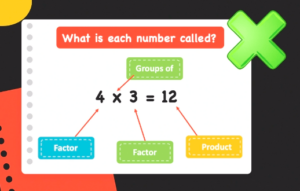
In the presentation, we talk through each step of the problem as we want students to think about it – what are the two factors in the problem? How many groups do we need to make? How many are in each group? How are we going to find the product?
As students act out 3 x 12, making 12 with 1 red ten and 2 white one discs, and doing that three times, they can put those in the defined groups to make that statement come true. When the numbers become higher, students can pull those discs, as I demonstrate in the tutorial video that comes the PowerPoint, as they’re starting to add the groups (repeated addition of 12 plus 12 plus 12) to figure out the product. They can count the ten discs – 10, 20, 30 – and then the ones – 2, 4, 6 – and get their answer of 36.
There’s nothing wrong with having students write the corresponding statements next to this problem – 12 plus 12 plus 12 equals 36. We know that 3 groups of 12 equals 36. You might even have some students that understand how division is the opposite – so if I did 36 divided by 12, I would end up with 3. Letting students play with the place value discs in this way to discover those kinds of connections is so valuable! You might want to limit exploratory problems to 4 “groups of”, but you could ramp up the number in each group as students develop more understanding. Maybe you do 4 x 23.
Your third graders might be hesitant, thinking I’m just learning how to do 8 x 5, why am I doing things with a double-digit number?? But, acting it out with place value discs will really help them to visualize what that problem is asking.
So, I need 4 groups of 24. I’ll get out 2 tens and 4 ones and do that three more times to make 4 groups. Because of how I set up my place value discs in my Math Salad Bar (check out that video tutorial here!), I usually have about 15 sets of place value discs and should have enough ones in each set for students to create this problem. Of course, if we’re doing this virtually with the place value discs from Didax.com, you won’t have to worry about this! Students can be creating their groups along with you as you demonstrate using the guided PowerPoint so they can still gain that understanding virtually.
You also can create different extension activities on Google Slides, with a virtual Math Salad Bar (get that free template here!) or replicating discs on slide, where students can model their thinking as they’re working through a problem.
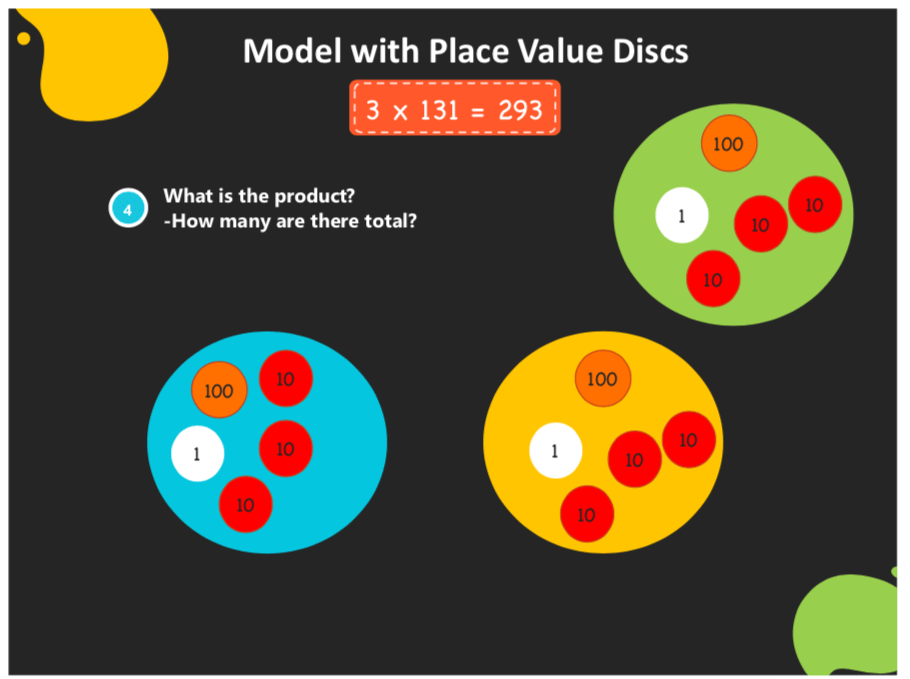
But don’t stop there – ramp it up to the 100s! When we model this, the third graders get really excited! I might ask to see 3 x 122, so students start building with 1 orange hundred disc, 2 red tens, and 2 white ones. Doing that three times, they’ll be able to figure out the product by manipulating the discs and adding it all up.
You might also create a problem where you have multiple tens, which create a hundred, which is one of the steps I demonstrate in the presentation and the tutorial video. This can sometimes be a brain-stretcher, but if kids can see it, the light bulbs tend to start going off!
I’ll start with 142 and ask students to show me 3 x 142, or 3 groups of 142. They start to add those parts together – 3 hundreds is 300, but then I have 4 tens + 4 tens + 4 tens, which will eventually create another hundred. Helping kids see how their addition and place value skills relate to multiplication is really powerful!
Obviously, we’re going to go back to really teaching the ideas of multiplication as we start to look at the multiplication journal and all those things, but this kind of exploratory experience lets kids experiment with what multiplication means as they work with concrete objects that connect with what they’ve done kinesthetically.
From the Concrete to the Pictorial Level
There’s nothing wrong with students taking it to that next level and showing their problems pictorially as well. They might be making groups and lining them up pictorially to show they have 122 and another 122 and another 122. Kids group their discs – can put their hundreds with the hundreds and the tens and the tens and the ones with the ones, but then put circles in there to demonstrate those groups as you’re adding it together.
I think that pictorial model really helps students solidify and understand what we’re doing in the concrete. As students start to make multiplication problems a little bit harder, they’re going to really start to understand this concept. Creating a pictorial model also really connects down the road as students start to decompose numbers. If they see that, when you do 12 x 3, it’s really like 10 x 3 and 2 x 3, they will be able to make that connection for how they can add or multiply things by decomposing them into parts. This all leads them to the idea of partial products which, again, really helps kids to really understand multiplication on a higher level.
Multiplication a Mile Deep
Of course, we are only at the beginning of multiplication by helping students explore the concrete connections, and partial products is further down the road, but it’s never too early to help students begin to make those connections by “playing” with place value discs. I think that you’ll find that students who approach multiplication in this way will not just have an understanding of multiplication that’s a mile long, but they’ll have it a mile deep. As you start to apply some of those concepts in multiplication gradually over time, your students are going to have a much more well rounded way of understanding what the meaning of multiplication is
We hope that you enjoy the presentation that we’ve created for you to use in your classroom to help your students build on their knowledge of multiplication at the concrete level!


")